how to build Static Website on gcs

前言

剛好有需求要將靜態網頁放到gcs上,因此就做個紀錄,因為只是紀錄,就不贅述一些自己知道的細節。

先安裝 gcloud

請參考 how to install gcloud


建立簡單的網站

1
2
3
$ npx create-react-app my-app
$ cd my-app
$ npm run build

建立Buckets

gsutil mb gs://[BUCKET_NAME]/


note: 如果要將網域設定為gcs的,那你就必須要命名為與網域相同的名稱,例如:www.example.com,那就要命名為www.example.com,gcs會告知你需要驗證domain


驗證domain

請到google search console去驗證你的domain,我這邊是使用TXT的方式驗證
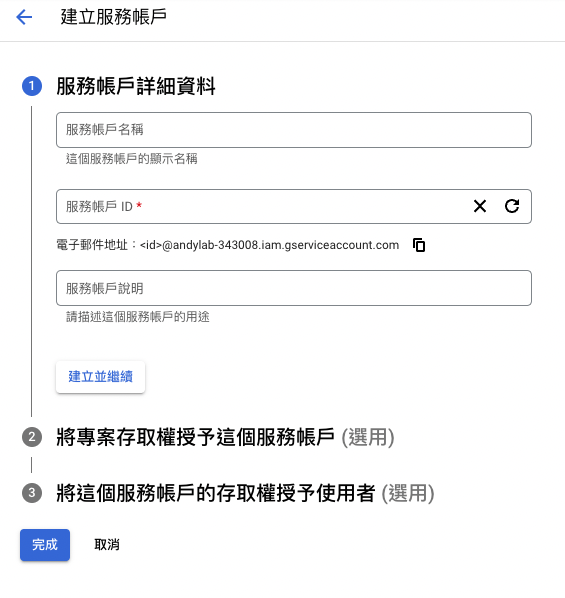

label

建立服務帳戶

這邊要建立一個服務帳戶給予權限,並且拿到 gcloud-service-key.json

label

透過gcloud & gsutil 開始上傳

1
2
3
4
5
6
$ gcloud auth activate-service-account --key-file gcloud-service-key.json
$ gcloud config set project $GCP_PROJECT_ID
$ cd build
$ gsutil cp -r * gs://$GCS_BUCKET_NAME/
$ gsutil iam ch allUsers:objectViewer gs://$GCS_BUCKET_NAME
$ gsutil web set -m index.html gs://$GCS_BUCKET_NAME

附上gitlab ci/cd 腳本

1
2
3
4
5
6
7
8
9
10
11
12
13
14
15
16
17
18
19
20
21
22
23
24
25
26
27
28
29
30
31
32
33
34
35
36
stages:
- build
- deploy

Build:
stage: build
image: node:14.20.0
before_script:
- yarn
script:
- yarn build:dev
cache:
untracked: true
paths:
- node_modules/
artifacts:
paths:
- ./build
only:
- develop

Deploy:
stage: deploy
image: google/cloud-sdk
script:
- echo "$GCP_SERVICE_KEY" > gcloud-service-key.json # Google Cloud service accounts
- gcloud auth activate-service-account --key-file gcloud-service-key.json
- gcloud config set project $GCP_PROJECT_ID
- cd build
- gsutil cp -r * gs://$GCS_BUCKET_NAME/
- gsutil iam ch allUsers:objectViewer gs://$GCS_BUCKET_NAME
- gsutil web set -m index.html gs://$GCS_BUCKET_NAME
dependencies:
- Build
only:
- develop